January 27, 2012
By George Spafford
George Spafford is building a replica of the Yugo M70B rifle using a stub parts kit. A new installment will appear here every Friday
Applying the Molyresin

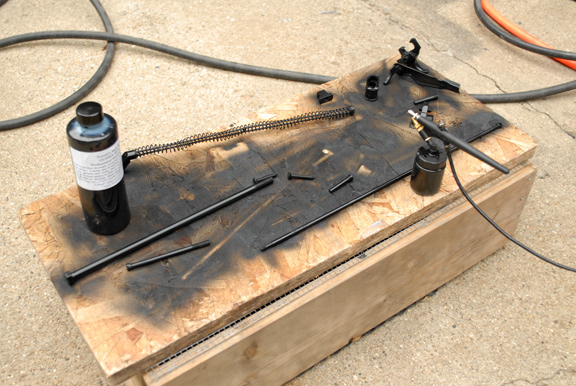
Molyresin is applied via a Harbor Freight airbrush to small parts and allowed to air dry.
Advertisement
I am a fan of John Norrell's Molyresin (www.molyresin.com). It is a simple one-part solution that you can apply with an airbrush or finishing paint gun and gives great results. Not only is it a finish, but because it contains molybdenum disulfide, it also provides a degree of lubrication. Because it is a "bake on" finish that requires heat to cure, the rifle can be used almost immediately whereas with some two part finishes, one to two weeks of curing is required.
As previously mentioned, the first step is to make sure the parts have been abrasive blasted at least, ideally have been Parkerized, and are thoroughly clean. Soaking it in acetone or spraying the rifle down liberally with brake cleaner are good steps. You will want to wear nitrile or other type of rubber gloves to keep oil from your hands from contaminating parts.
Put the parts in the oven and preheat them to 100 degrees F. By preheating, the finish will instantly dry when applied, which reduces the risk of the finish running.
Advertisement
The best way to apply the finish is with an airbrush, as you have very precise control of where the finish is going and can conserve material. A finishing paint gun will work too, but you will use more finish. I use the relatively inexpensive Harbor Freight airbrushes and will buy three of four at a time when they go on sale. I use them until there is a problem and then throw them out.
When I am connecting the airbrush to my airlines, I insert a disposable air filter that has quick-connect couplings on it. This helps remove moisture and oil from the air supply. If you see what looks like "fish eyes" or "bullseyes" showing on on your part as you are spraying, odds are the air supply is contaminated with water and/or oil.
Follow the directions that come with the Molyresin. It is very important to shake the finish thoroughly in the bottle before pouring it into the airbrushÃs cup. There are a number of solids that will settle to the bottom of the bottle that need to be shaken back into suspension in order to work correctly.
To apply the finish, I first test the airbrush on whatever scrap is handy to verify the material is flowing correctly and make any adjustments. I then spray the finish on to each part in nice controlled sweeps, applying a light to medium coat. You do not want to spray it on so heavily that there are runs.

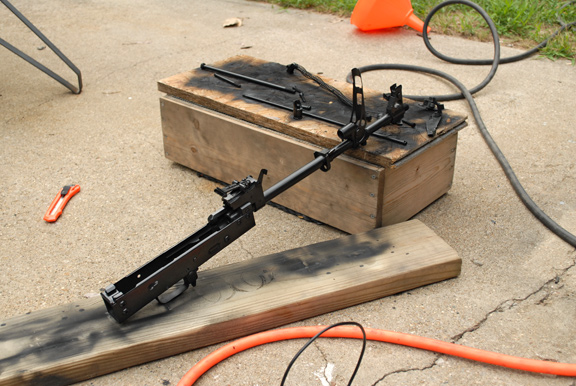
The barreled action has the finish applied.
Allow it to air dry and carefully move any parts around that require coating underneath such as the grenade and rear leaf sight plus the lower handguard retainer.
You will notice that the finish dries very quickly. I let my finished parts sit in the sun for a bit before I touch them to turn them over. I apply 2-3 coats until everything has a nice consistent color.
When the finish is dried, the parts are put in an oven at 300 degrees F for one hour. One of the nice things about Molyresin is that it is non-toxic and can be cured in an oven. You will notice a smell, so good ventilation helps. Also, the 300 degrees F is important. Use an oven thermometer or a digital thermometer to confirm the oven is at that temperature and certainly not below it.
I need to admit that my wife has banished my gun work from the kitchen, so I use a tall dedicated food smoker cabinet to cure finishes on actions and barrels. I bring this up as your wife or girlfriend may not be very understanding about new "interesting" smells coming from your work!
The M70B1 is now ready for reassembly and lubrication. I carefully inspect everything as it goes back together and again perform a function test on the fire control group. My last step is to clean the bore one last time and make sure there is some form of corrosion inhibitor in there, be it oil or CLP.

